
Microsoft Outlook does not provide the built-in CalDAV support. To sync your CalDAV calendar, you will need the third-party connector.
Outlook CalDav Synchronizer is a free Outlook Plugin, which synchronizes events, tasks and contacts between Outlook and any CalDAV or CardDAV server. Supported Outlook versions are Office 365, 2019, 2016, 2013, 2010 and 2007.
Step 1
Visit the Outlook CalDav Synchronizer page and download the application.
Step 2
Open the zip file and double click CalDavSynchronizer.Setup.msi. Follow the steps to install the application. Once installed, proceed to Step 3.
Step 3
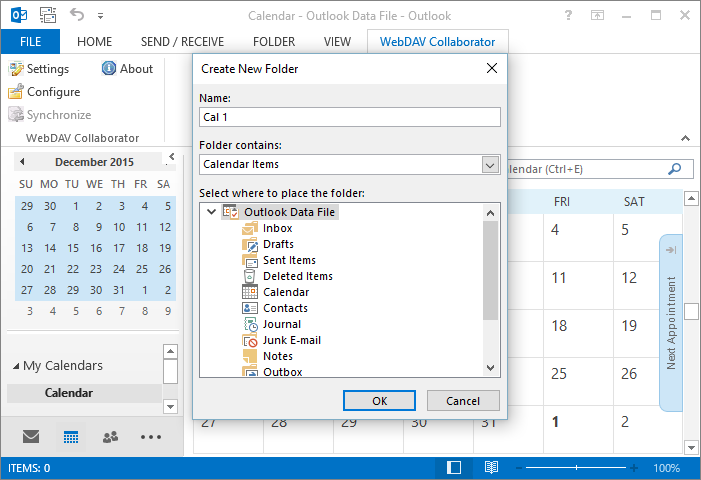
create a new calendar. Go to Calendars, right-click on Calendar node and select New Calendar in the context menu.
Provide the new calendar name and specify the location of your new calendar. In the Folder contains drop-down select the Calendar Items. Select OK:
Step 4
Open Outlook, and go to CalDav Synchronizer tab and select Synchronization Profiles.
Step 5
Click the green + to add a new profile
In the Select Profile Type dialog select Generic CalDAV/CardDAV:
Step 6
Enter the name of the profile, and select the folder.
Step 7
Enter the following
- DAV URL: https://dav.rebel.com
- Username: Your email address.
- Password: Your email password
- Email Address: Your email address.
Step 8
Click Test or discover settings. Then click OK in the popup. This will update the DAV URL.
Step 9
Click OK to save the profile. You can now synchronize your calendar.
Comments
0 comments
Please sign in to leave a comment.